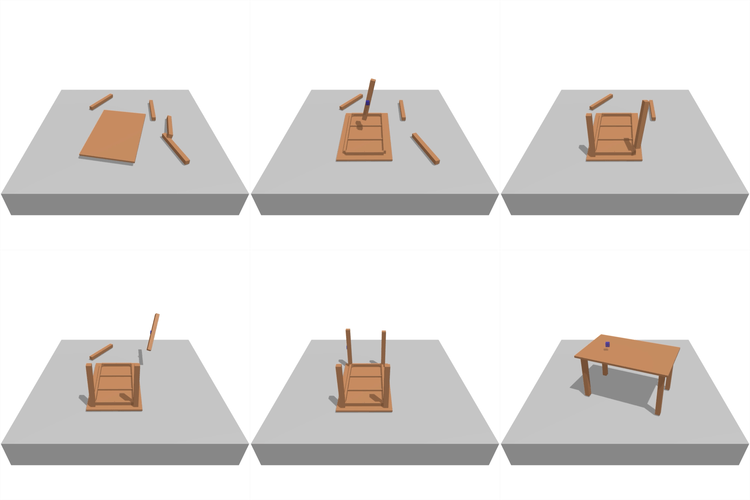
I’m excited to announce the first release of the IKEA Furniture Assembly Environment, a robotic simulation of furniture assembly. The main contributions of this environment are:
-
Furniture: We had a digital artist create meshes of over 80 IKEA furnitures faithfully, enabling realistic furniture simulation.
-
Robots: We support Baxter and Sawyer in the simulation, and plan to add more.
-
Realistic Visualization: Unity3D engine gives us realistic lighting, textures, and scenes.
-
Developer Ergonomics: Gym-like API for easy reinforcement learning setup.
Check out the website for more information and visuals on the environment. The rest of this blog post will be on the technical architecture and implementation for those interested in using and extending the environment.
Overall Architecture: MuJoCo and Unity
Our environment can be divided into two portions, the MuJoCo physics simulation and the Unity3d game engine. MuJoCo is a widely used simulator for modeling physical tasks by the robotics and reinforcement learning community. It is efficient and accurate, which is important for modeling complex dynamics like gripping an object with friction and.
While MuJoCo is great, it is not very pretty. The graphics are not realistic, and the options in lighting, shadows, textures are very limited when compared to game engines. Game engines on the other hand, have great realistic visuals, making it desirable to use them for rendering our simulation. The more real the simulation, the more likely we can transfer skills learned in simulation to the real world. Using the MuJoCo-Unity plugin, we can map MuJoCo objects to Unity assets, and render the MuJoCo scene in Unity.
Robotic Simulation
To simulate the Baxter and Sawyer robots, we use the SURREAL Robosuite library. What they do is straightforward. They provide a URDF file, a XML file used to describe the robot and the mesh files. MuJoCo loads the URDF file into the scene and we’re good to go. The next step is to implement robotic control. We use Pybullet to offer IK, impedance, and joint velocity control to Sawyer and Baxter.
Furniture Simulation
Similar to the robots, the furniture is modeled in a MuJoCo XML file. Each part is defined as a MuJoCo body. We also define the connection sites for each part in the body tag, as well as the mesh for the part. To define physical attachment points, we define weld constraints between parts that are connectable. During runtime, if the parts are connected, we can turn on the weld constraint. Welded parts will then be physically attached in the simulation.
Attachment Process
 During runtime, we check if there are two connection sites that are close together in terms of euclidean and rotational distance under some threshold. If they are, the parts can be attached together. Because we know the ground truth position and rotation of the attached parts, we can make it more realistic by interpolating towards the target position and rotations instead of just teleporting the objects into the target poses. We also use this interpolation code to generate demonstrations, as seen above.